Friday, October 27, 2006

Virtual Peak Bagging

Peak bagging is the term given by hikers and mountain climbers to the activity of ascending to the summit of a number of mountains. One of the rewarding aspects of peak bagging is that after each arduous climb to the top, you get to take in the terrific views.

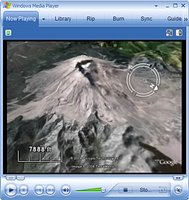
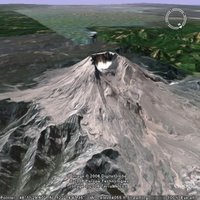
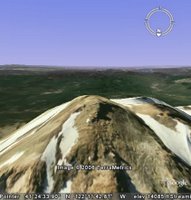
With Google Earth, you can determine what the view is like from the top of these peaks without breaking a sweat or packing your tent. To do this, go to your favorite mountain (the image to the left features the view from Mount Shasta in northern California). Tilt the terrain and check out the view in all directions.

I like to position the 3D viewer so I am looking directly down on the mountain from an elevation not much higher than the peak, then I use the mouse scroll wheel to rotate the view so I can see the mountain-top view from all angles.

You can start by looking at this placemark.

Wednesday, October 25, 2006

Measuring Stick

Google Earth allows you to measure distances and areas on the Earth. What exactly you can measure depends on what version of Google Earth you have (learn more here).

The ruler feature represents a great way to quickly determine distances from Point A to Point B. To do this, simply click the ruler icon and click two points in the 3D viewer. Viola... the distance appears in the Ruler dialog box. You can do this via a line with multiple segments (a path) by clicking the Path tab in the Ruler dialog box and clicking multiple points in the 3D viewer.

Of course, all of this is different than measuring driving distances, which you can also do in Google Earth.

I am particularly impressed with the polygon and circle feature (Google Earth Pro only). It allows you to draw these shapes and determine figures such as perimeter and area. I used this recently when trying convince city planners in my home town to build a facility (a dirt bicycle jump area) in a public park. The planners wanted to know how we could fit such a one acre facility in the park. I pulled out Google Earth Pro and easily marked out an available park area that equaled a tad over one acre.

Tuesday, October 24, 2006

Movies in Earth, Part 1

This is the first post on this topic. More to follow.

Certain versions of Google Earth allow you to create electronic movies that you can share with others. The user guide has a complete topic on this subject.

Wondering how you can use the ideal camera perspectives in your movies? One useful way to do this is to use placemarks and the Play Tour feature. To do this, first create a folder in the Places panel and name it appropriately (e.g. My Movie Placemarks). Select that folder and create series of placemarks with the exact snapshot view that you want depicted in your movies. Be sure to sort them in the order you want to appear in the movie.

Select the top of the folder. Start the movie and immediately click the Play Tour button. Google Earth plays a tour of the placemarks you have created and records it in the movie. (If you selected Standard Quality in the Movie Maker dialog box, you'll need to manually stop recording when the tour is complete.)

Note that it is useful to play the tour before creating the movie so as to preview how the movie will appear. Also note that you can uncheck the placemarks if you do not want them to appear in your movie.

Thursday, October 19, 2006

Viewing KML

KML (Keyhole Markup Language) is the code that allows users to depict geographic features such as points, lines, images, polygons, and models in Google Earth. It is the HTML of Google Earth (and Google Maps).

You can see how KML works in a variety of ways, including:
This last method is very helpful because you can see the feature first in Google Earth and then view the KML behind it. For example, you can view the KML of a placemark or other content and see how it is created and structured.

There are a several ways to view the KML source of existing content in Google Earth:
  • Right click (CTRL click on the Mac) an item in the Places panel. Choose Copy. Open a text editor (e.g. Notepad) and choose Paste. The KML for the item appears in the text editor.
  • Right click (CTRL click on the Mac) an item in the Places panel. Choose Save As and save the file. Open this file in a text editor.
You can edit these files and open them again in Google Earth, provided you follow the conventions of KML as described in the documentation.

Tuesday, October 17, 2006

Rotating and Tilting

Perhaps the most overlooked method of navigating in Google Earth is the technique of rotating the view by holding down the middle mouse button or depressible mouse wheel.

Give it a try. First, navigate to a favorite location in Google Earth. Press down the middle mouse button or wheel and move the mouse. Moving up and down tilts the view, whereas moving left or right rotates the view. Cool, eh?

This represents a very useful way to adjust your perspective of a location. In fact, this is how I always view an area once I have located it.

Learn more about navigating in Google Earth.

Monday, October 16, 2006

The World of Google Earth Layers

Google Earth layers are collections of points of geographic interest. They are grouped by themes. For example, some of my favorite include:
  • Featured Content - These are some of most interesting places available in Google Earth. Currently, you can view US National Park trails, National Geographic features, city video guides and more.
  • Google Earth Community -This is content derived from the Google Earth Community forums (BBS) and comes directly from other users like yourself.
  • Parks and Recreation Areas - As an outdoor enthusiast, I like to enable this layer so I can see locations of open space near my home and areas that I plan to visit.
  • Transportation - Again, this is a great set of information for planning trips. With it, you can see train, airport and ferry locations and plan how to get around.
Viewing any of these layers is as simple as checking each in the Layers panel (bottom left corner of the Google Earth window). Note that some of these layers are actually folders, meaning that you can expand them and check individual layers beneath them.

Learn more about layers.

Thursday, October 12, 2006

Moab Bound

Several Googlers (myself included) are headed to Moab, Utah to particiapte in the 24 Hours of Moab mountain bike race. Sponsored by Google Earth, we will be on hand to demo Google Earth and the neat features that pertain to GPS tracking.

Did you know that you can track your route (driving, hiking, biking, etc.) in Google Earth using a GPS device? This allows you to view your route in 3D terrain in the application and share this with others. To see what I mean, I've posted this file that describes the 24 Hours of Moab race course.

You need the Google Earth Pro or Plus to upload your own GPS files. To learn more about using GPS features of Google Earth, see this section of the user guide.

Welcome to Using Google Earth

This blog is dedicated to the millions of users of Google Earth who use this amazing tool to explore incredible locations around our world. Its purpose is to share occasional posts that describe how to use both basic and advanced features of Google Earth.

Google Earth is different. It provides a 3D rendition of our world that transcends traditional computer mapping products. Therefore, it can be tricky to convey to users how to use this unusual product. I hopeful that this blog can help bridge this gap.

I am hoping that this forum can be collaborative, so I look forward to hearing feedback from you. Please leave comments.