Sunday, December 24, 2006

More on Geology and Google Earth

Today, the San Jose Mercury News published a great article about Google Earth and exciting applications of its technology by third parties.

Specifically, the story focuses on scientists who use KML to describe and share geological data. I mentioned such applications in a blog entry on 12/19. Check out this section of the Mercury News story:

"(In Google Earth) you can track radiation levels at the Chernobyl nuclear power station in Ukraine, follow the spread of malaria across the planet, see how the Earth's continents have rearranged themselves over millions of years.

The Jane Goodall Institute, known for its pioneering chimpanzee research, has been using Google Earth to illustrate blog entries that follow the daily dramas of the chimps.

The non-profit Amazon Conservation Team has been training Indians to use Google Earth to map and catalog their forest so they can monitor deforestation.

The National Oceanic & Atmospheric Administration's Coral Reef Watch program uses it to monitor sea surface temperatures and hot spots."

Read the whole story.

Thursday, December 21, 2006

Santa Live

If you have not checked out the Google Earth Santa Tracker, you are missing out on a bunch of fun. You can find toys around the world by solving puzzles about our world. And starting on Christmas Eve, you can track Santa live as he navigates the globe delivering his tidings to well behaving little ones everywhere.

My kids love this feature and it fires them up even more for Christmas morning (as if they needed any help with this).

Learn more and download the Santa Tracker.

Tuesday, December 19, 2006

Geology in Google Earth

I recently attended the AGU conference in San Francisco. As you might imagine, there was much excitement there about Google Earth and KML. I heard from a large number of scientists who are using these tools to present geological information to the public at large.

The advantage of Google Earth is that it can show information that is otherwise dry and academic in ways that are visually fascinating. Large databases of geological data can be transformed into 3D presentations that capture the imaginations of the rest of us. Scientists are also drawn to these tools because Google Earth and Maps are used by many millions of people worldwide and thus provide a huge audience for the stories these scientists want to convey.

Compelling examples of such geological and environmental implementations include:

Layers - These show a number of interesting points of interest around the world, such as volcanoes, glaciers, mountain ranges, water bodies and more. These layers include Smithsonian, National Geographic, UNEP and Geographic Features, among others.

Logging in Northern California - Rebecca More of the Google Earth team created this KML file that describes planned logging near Los Altos and how it could affect nearby communities. Read more about this on Google Earth Blog.

Glaciers - I also learned about this via Google Earth Blog. A poster on the Google Earth Community BBS created this KML file that shows condition of glaciers around the world.

Sunday, December 17, 2006

Setting a Home View

File this under "neat feature many users don't know about". You can set a home view in Google Earth. This works much like a home page does in your web browser; each time you open Google Earth, the 3D viewer displays the exact same location and perspective you set. To do this in Version 4:
  1. Create a new placemark or open an existing one.
  2. Navigate and tilt the 3D viewer to the exact perspective you want.
  3. Right-click (CTRL click on the Mac) the placemark and select Snapshot View from the pop-up menu.
  4. Rename the placemark "default".
Each time you restart Google Earth, the application zooms to this placemark and view. Note that if you are using the Santa Tracker, you need to uncheck this folder for your home view to work.

Wednesday, December 13, 2006

Editing Wikipedia Layer Content

As the Wikipedia layer in Google Earth has caused much excitement, I thought it would be useful to explain more how you can customize this content:

How do I get my Wikipedia article to show up in the Google Earth Geographic Web layer?

You must geotag the article. The simplest way to do this to use one of the "{{coor title d[ms]}}" or "{{coor at d[ms]}}" templates on Wikipedia. These templates can be used anywhere within the article text.

For example, if the article for San Francisco, California contained the following markup anywhere within the article text:

"{{coor title dm|37|46|N|122|26|W}}"

Google recognizes this location and includes the article the next time we publish the layer.

Additionally, Google supports references to the "{{coor d[ms]}}" or {{coor title d[ms]}} or {{coor at d[ms]}} templates within an Infobox template, so long as it is keyed by either "coordinates" or "coords" keywords. For an example of such a template, see the Infobox_CityIT template and an example of its use in the Sorrento, Italy article.

I just read an article in Wikipedia. It has geocoordinates in the text, but I do not see it in the Google Earth Geographic Web layer. Why not?

There are several reasons why this may be happening. For instance, this article may have been altered after Google processed the Wikipedia articles. Additionally, it could be that the coordinates are not posted in a way that Google Earth supports (see previous question).

How can I obtain coordinates for a location in Google Earth?

You can move the cursor over any location on the earth in the 3D viewer and see the coordinates for the location in the status bar at the bottom of the 3D viewer. Learn how to change the latitude/longitude display.

You can also create a placemark for a location and view the coordinates for the location in the New Placemark dialog box.

I will post more about Wikipedia and Google Earth soon. Several of us are working on a FAQ that we hope to share soon.

Monday, December 11, 2006

Wikipedia in Google Earth

Google just published a new collection of Geographic Web layers for Google Earth, which includes a Wikipedia layer. Those of you who are familiar with Wikipedia know what an amazing resource of information it can be.

Many (but certainly not all) Wikipedia entries are included in this layer. This means that when you check this layer, Wikipedia points of interest (POIs) display for locations around the world. Simply navigate to the area you are interested in and click any relevant Wikipedia POIs to view Wikipedia content that describes the area, city, landmark, etc.

To enable this layer in Google Earth, in the Layers panel, check the Geographic Web folder or open that folder and check Wikipedia. Learn more about layers here.

Wednesday, December 06, 2006

Your Horizon

A friend recently asked me if Google Earth could help him determine which mountains he sees as he looks out of his window. He lives in Cool, California on the western slope of the Sierra Nevada. As he looks east, he sees some prominent peaks on the crest of the Sierra near Lake Tahoe.

The traditional method of identifying these mountains would be to obtain a compass heading for the direction you are looking in and mark a map with a line from your vantage point heading in this same direction. But in Google Earth, I suggested a different technique for my friend.

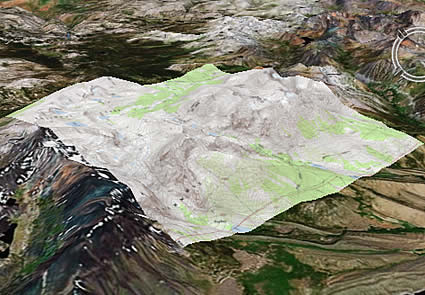
First, I put a placemark at the location of his house. Next, I made sure that the terrain layer was on. Using the navigation controls, I rotated and tilted the view so that it was looking directly east (the direction of the peaks my friend sees from his house) from close to ground level. I found that the peaks were difficult to pick out, so I exaggerated the terrain to 2.0 so I could see the peaks more clearly.

Having picked out the peaks, I then navigated from my friend's house to the highest peak on the horizon. In the Layers panel, I checked both Alternative Place Names and Geographical Features. This last step displayed the name of the peaks, which answered my friend's original question (click the image in this blog post).

Using the Measuring tool, I was even able to determine the distance between my friend's house and these peaks.

Monday, December 04, 2006

Fancy Placemarks

If you have spent enough time in Google Earth, you have seen them. When you click on certain placemarks, balloons appear that feature stylized text, hyperlinks and even pictures. So how is this done?

Each placemark (or set of placemarks) is described in a KML file. Within the description of each placemark in the KML file, you can use HTML much in the same way you would if you were creating a web page. Background colors, tables, etc.

According to the KML tutorial:
The most important thing you need to know about authoring your own HTML in placemarks is the use of the tag. If you want to write standard HTML inside a tag, you really should put it inside a CDATA element. If you don't, the angle brackets will need to be written as entity references to prevent the Google Earth from parsing the HTML incorrectly. (This is a standard feature of XML applications and not unique to Google Earth.)
Read more about using descriptive HTML. Or you can see how others have done this by looking at the KML used in other placemarks (see my posting on 10/19). And of course, you can change the icon used by the placemark in the 3D viewer (learn more here).

Wednesday, November 29, 2006

Where Was This Photo Taken?

Yesterday, I wrote an entry that mentioned the excellent site mtbguru.com. This website allows users of trails to share a variety of information about their treks with other users of the site.

One of the best features of mtbguru.com is how it takes photos you have uploaded to the site, analyzes both the time the photo was taken and GPS data of the trek and calculates the approximate location where the photo was taken. In other words, it matches the location and time information in the GPS file and correlates this with the time of the photos to extrapolate a location for each image.

Mtbguru.com calls this process temporal geotagging. Of course, its accuracy is dependent on you synchronizing the clock on your GPS device and camera. But is a very slick way of placing your photographs in a geographical location.

Mtbguru.com uses this technique to create Google Maps that show both the path of the trail and location of the photos. Check out the map on this page (be sure to click the photo icons). Or download this KML file to view this bike ride in Google Earth.

Monday, November 27, 2006

Making GPS Tracks

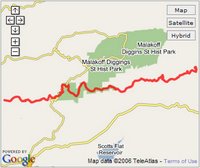
I am an avid mountain biker and spent a considerable portion of the Thanksgiving break riding local trails. My fellow Googler and cyclist Dave joined me and brought his nifty Garmin GPSMAP 60CSx GPS device with him to track our trail riding.

Google Earth Pro and Plus allow you to import GPS data and display it in the 3D viewer. As someone who has used electronic maps for many years, I love this feature. You can see exactly where you rode and with terrain turned on, you can gain new perspective on your trek. Often, I view the GPS track of a ride and think "ahhhh... so that is why my legs hurt so much. That hill is steep!"

Other website designers have come up with innovative ways to display GPS data in Google Earth and Google Maps. One such site is mtbguru.com which makes very effective use of GPS and KML. It even displays geo-referenced photographs taken on the trails. MotionBased is another great web-based service that allows you to review GPS data and view it in Google Earth and Maps.

Tuesday, November 21, 2006

Tweaking Image Overlays

My friend Keith asked me a few questions about using overlays in Google Earth. Given my recent post about using historical map overlays, I thought I would share this knowledge with the rest of the blogosphere.

Tip: Rotating an image overlay you have placed in Google Earth - Right click (CTRL click on the Mac) the overlay in the Places pane and choose Properties. The Edit Image Overlay dialog box appears. Click and drag the diamonds that appear on the overlay.

Tip: Resizing an image overlay without changing its proportions - Right click (CTRL click on the Mac) the overlay in the Places pane and choose Properties. Hold down the Shift key as you click and drag the corners of the image overlay.

Learn more about using image overlays.

Thursday, November 16, 2006

Historical Map Overlays

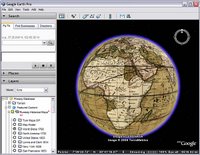
Recently, Google released a set of Rumsey Historical Maps as a layer in Google Earth (see blog post). These are maps which appear over the Earth in the 3D viewer. They allow you to compare historical maps to the state-of-the-art geographical content that appears in Google Earth.

As cool as this is (and it is very cool), did you know that you can overlay any historical map you find using the overlay feature? For example, recently, I found an online image of a historical map of my hometown of Dedham, Massachusetts. I saved this image on my computer and then placed it as an overlay in Google Earth.

What I learned was fascinating. The playground in our neighborhood is all landfill; almost 100 years ago, it was part of the Charles River. Very few of the current streets in this neighborhood existed, but a few did. At the time, the entire neighborhood was called "Dedham Island", while this same neighborhood was always known to me as Riverdale.

You try this yourself by searching for an image of a map of your home town and placing it as an overlay in Google Earth. You can also contact the local historical society and see if they have any maps you could scan or obtain electronically. Of course, this makes a great school project for teachers and students.

To enable the Rumsey maps in Google Earth, in the Layers panel, open the Featured Content folder then the Rumsey Historical Maps folder. Choose the map you want to view or choose Map Finder to display icons for available maps around the world.

Learn more about using your own map overlays.

Wednesday, November 15, 2006

Using Different Controllers

Using a mouse with a scroll wheel is an effective way to navigate in Google Earth , but it is only one way. Google Earth Version 4 also supports the use of different controllers such as joysticks. Navigating with these controllers can be more familiar to gamers, especially those who have used flight simulation products.

You can use GForce navigation setting in Google Earth to simulate joystick navigation when you are using a mouse. Using a joystick or other controller with the GForce setting, you can use the yoke to fly like an aircraft. To change to GForce mode, type Ctrl (Command/Open Apple Key on the Mac) + G when the window focus is in the 3D viewer. The cursor becomes an airplane symbol when you are in this mode.

Also note that keyboard shortcuts allow you to move using your keyboard. Learn more about navigation.

Friday, November 10, 2006

Hands On Learning

Today, we released a new set of Google Earth tutorials. These include the following subjects:

Navigating on the Earth
Searching for Locations and Businesses
Marking Locations

While these tutorials describe Google Earth basics, future tutorials will describe how to use more advanced features. I would love to hear from you about other topics you would like to see.

You always can access the latest tutorials within Google Earth ( click Help > Tutorials).

Wednesday, November 08, 2006

Terrain Options

You can change how Google Earth Version 4 displays the terrain (physical layout) of the areas you visit. There are two relevant options:

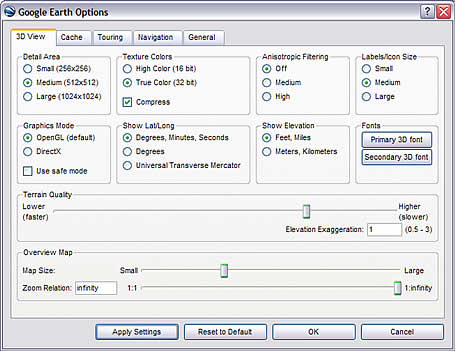
Terrain Quality - This setting allows you to determine how coarse or fine the Earth's terrain appears in Google Earth. To access these settings, click Tools > Options > 3D viewer tab (on the Mac, click Google Earth > Preferences > 3D View tab). Under Terrain Quality, use the slider to choose the appropriate level of detail. Using a Lower (faster) settings improves performance of Google Earth, but terrain appears less detailed. Using a Higher (slower) setting improves the depiction of terrain, but at the cost of performance.

Elevation Exaggeration - In this same dialog box (see above), change the Elevation Exaggeration value to depress or exaggerate terrain as it appears in the 3D viewer.

Learn more about these and other related options.

Tuesday, November 07, 2006

3D Buildings in Google Earth

You can view 3D buildings for many areas in Google Earth. There are a number of ways to do this.

3D Warehouse link
- Download this in Google Earth. This is a network link to Google's 3D warehouse. It allows you to view photo-realistic 3D buildings in Google Earth that are available in the 3D Warehouse. Once you have downloaded this, any geographically-referenced 3D model in the Warehouse appears in Google Earth as a special placemark that allows you to open the associated 3D building. Once you have downloaded the 3D Warehouse link, be sure that this link is checked in the Places panel. Learn more about this feature.

3D Building layer
- In the Layers panel, check 3D Buildings. This displays 3D buildings in various metropolitan areas. Learn more about using layers.

Create your own 3D model
- You can create a model of any building you like and place it Google Earth using Google SketchUp. Learn more about placing 3D models in Google Earth.

Thursday, November 02, 2006

New Version of Google Earth

Yesterday, Google released an updated Beta version of Google Earth 4. This release includes a number of neat, new features and enhancements, including:

Paths and polygons are included in Free - Users of the Free version can now draw both paths and polygons. Learn how to use these features here.

New icons - In addition to being more attractive, the pin of placemark icons point to the exact placemark location. There is also a new set of icons.

Image overlays can have altitude -This is useful for overlays such as weather radar images where you want to see the image from directly above, but also want to be able to see the ground imagery from an angle.

Printing - You can print search results and folders of placemarks.

Additional Pro features - A number of formerly premium features are now included in Pro, including premium printing quality, GIS data importing and movie making!

Increased performance of 3D models - These models (such as those created in SketchUp or imported from the 3D warehouse) now load quicker and appear more realistic.

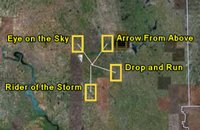
Coincident placemarks expand - When a number of icons appear together in the 3D viewer and you click on them, they expand into a star-formation (see image on left). This de-clutters the view and allows you to chose which one you want to explore further.

This is a partial list of new features. Learn more. Or better yet, download the new version.

Wednesday, November 01, 2006

Voting on Earth

If you are in the United States, you probably know all about next week's elections. Google Earth can help you participate in this democratic process in a number of ways:

Learn where the elections are
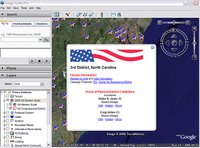
- Google Earth offers a layer (2006 Election Guide) that shows you complete election information for races in congressional districts around the United States. This layer also shows the geographical border of each district. Read more here.

Register
yourself - Using the aforementioned layer, you can even register to vote! See the link at the top of each placemark balloon.

Understand the candidates
- Each placemark in this election guide layer includes links to news, images and other websites about the candidates.
To learn more about using layers, see the user guide or check out this earlier blog post.

Friday, October 27, 2006

Virtual Peak Bagging

Peak bagging is the term given by hikers and mountain climbers to the activity of ascending to the summit of a number of mountains. One of the rewarding aspects of peak bagging is that after each arduous climb to the top, you get to take in the terrific views.

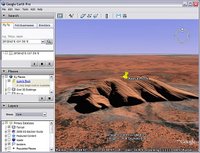
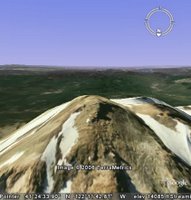
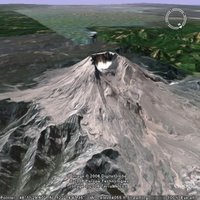
With Google Earth, you can determine what the view is like from the top of these peaks without breaking a sweat or packing your tent. To do this, go to your favorite mountain (the image to the left features the view from Mount Shasta in northern California). Tilt the terrain and check out the view in all directions.

I like to position the 3D viewer so I am looking directly down on the mountain from an elevation not much higher than the peak, then I use the mouse scroll wheel to rotate the view so I can see the mountain-top view from all angles.

You can start by looking at this placemark.

Wednesday, October 25, 2006

Measuring Stick

Google Earth allows you to measure distances and areas on the Earth. What exactly you can measure depends on what version of Google Earth you have (learn more here).

The ruler feature represents a great way to quickly determine distances from Point A to Point B. To do this, simply click the ruler icon and click two points in the 3D viewer. Viola... the distance appears in the Ruler dialog box. You can do this via a line with multiple segments (a path) by clicking the Path tab in the Ruler dialog box and clicking multiple points in the 3D viewer.

Of course, all of this is different than measuring driving distances, which you can also do in Google Earth.

I am particularly impressed with the polygon and circle feature (Google Earth Pro only). It allows you to draw these shapes and determine figures such as perimeter and area. I used this recently when trying convince city planners in my home town to build a facility (a dirt bicycle jump area) in a public park. The planners wanted to know how we could fit such a one acre facility in the park. I pulled out Google Earth Pro and easily marked out an available park area that equaled a tad over one acre.

Tuesday, October 24, 2006

Movies in Earth, Part 1

This is the first post on this topic. More to follow.

Certain versions of Google Earth allow you to create electronic movies that you can share with others. The user guide has a complete topic on this subject.

Wondering how you can use the ideal camera perspectives in your movies? One useful way to do this is to use placemarks and the Play Tour feature. To do this, first create a folder in the Places panel and name it appropriately (e.g. My Movie Placemarks). Select that folder and create series of placemarks with the exact snapshot view that you want depicted in your movies. Be sure to sort them in the order you want to appear in the movie.

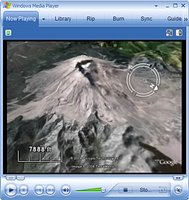
Select the top of the folder. Start the movie and immediately click the Play Tour button. Google Earth plays a tour of the placemarks you have created and records it in the movie. (If you selected Standard Quality in the Movie Maker dialog box, you'll need to manually stop recording when the tour is complete.)

Note that it is useful to play the tour before creating the movie so as to preview how the movie will appear. Also note that you can uncheck the placemarks if you do not want them to appear in your movie.

Thursday, October 19, 2006

Viewing KML

KML (Keyhole Markup Language) is the code that allows users to depict geographic features such as points, lines, images, polygons, and models in Google Earth. It is the HTML of Google Earth (and Google Maps).

You can see how KML works in a variety of ways, including:
This last method is very helpful because you can see the feature first in Google Earth and then view the KML behind it. For example, you can view the KML of a placemark or other content and see how it is created and structured.

There are a several ways to view the KML source of existing content in Google Earth:
  • Right click (CTRL click on the Mac) an item in the Places panel. Choose Copy. Open a text editor (e.g. Notepad) and choose Paste. The KML for the item appears in the text editor.
  • Right click (CTRL click on the Mac) an item in the Places panel. Choose Save As and save the file. Open this file in a text editor.
You can edit these files and open them again in Google Earth, provided you follow the conventions of KML as described in the documentation.

Tuesday, October 17, 2006

Rotating and Tilting

Perhaps the most overlooked method of navigating in Google Earth is the technique of rotating the view by holding down the middle mouse button or depressible mouse wheel.

Give it a try. First, navigate to a favorite location in Google Earth. Press down the middle mouse button or wheel and move the mouse. Moving up and down tilts the view, whereas moving left or right rotates the view. Cool, eh?

This represents a very useful way to adjust your perspective of a location. In fact, this is how I always view an area once I have located it.

Learn more about navigating in Google Earth.

Monday, October 16, 2006

The World of Google Earth Layers

Google Earth layers are collections of points of geographic interest. They are grouped by themes. For example, some of my favorite include:
  • Featured Content - These are some of most interesting places available in Google Earth. Currently, you can view US National Park trails, National Geographic features, city video guides and more.
  • Google Earth Community -This is content derived from the Google Earth Community forums (BBS) and comes directly from other users like yourself.
  • Parks and Recreation Areas - As an outdoor enthusiast, I like to enable this layer so I can see locations of open space near my home and areas that I plan to visit.
  • Transportation - Again, this is a great set of information for planning trips. With it, you can see train, airport and ferry locations and plan how to get around.
Viewing any of these layers is as simple as checking each in the Layers panel (bottom left corner of the Google Earth window). Note that some of these layers are actually folders, meaning that you can expand them and check individual layers beneath them.

Learn more about layers.

Thursday, October 12, 2006

Moab Bound

Several Googlers (myself included) are headed to Moab, Utah to particiapte in the 24 Hours of Moab mountain bike race. Sponsored by Google Earth, we will be on hand to demo Google Earth and the neat features that pertain to GPS tracking.

Did you know that you can track your route (driving, hiking, biking, etc.) in Google Earth using a GPS device? This allows you to view your route in 3D terrain in the application and share this with others. To see what I mean, I've posted this file that describes the 24 Hours of Moab race course.

You need the Google Earth Pro or Plus to upload your own GPS files. To learn more about using GPS features of Google Earth, see this section of the user guide.

Welcome to Using Google Earth

This blog is dedicated to the millions of users of Google Earth who use this amazing tool to explore incredible locations around our world. Its purpose is to share occasional posts that describe how to use both basic and advanced features of Google Earth.

Google Earth is different. It provides a 3D rendition of our world that transcends traditional computer mapping products. Therefore, it can be tricky to convey to users how to use this unusual product. I hopeful that this blog can help bridge this gap.

I am hoping that this forum can be collaborative, so I look forward to hearing feedback from you. Please leave comments.